Posts

Boost website rankings and traffic

Image
  Photo by  Chang Duong  on  Unsplash Website rankings on search engines matter. Various studies  show a website in the first position on a search page gets 33% of clicks for a specific keyword query. And at least 75% of search traffic goes to websites on the first page of search results. No single marketing avenue has drawn as much enthusiasm (or has been more misunderstood) as website rankings and Search Engine Optimization (SEO). For a marketer or content producer, the first thing to consider is finding the right keywords. The next step is ensuring the website is easy to navigate and be found by the search engine for those keywords. There are simple step anyone can take to boost website rankings. The people at Websites That Sell in Australia have put together an infographic to show you. Here are 7 easy ways to boost website rankings and traffic and here’s why. MOBILE FIRST:  51.1% of web traffic originates from mobile devices in...

Create a YouTube channel

Image
  Photo by  Linda Xu  on  Unsplash To start a YouTube channel, all you need is a Google account . Then go to YouTube and create a new channel . You will have to name your channel (you can use your name or the name of your business) and agree to the terms. There are a few things you should do before you start uploading videos: Add a channel icon The channel icon can be an image of your logo or a picture of yourself. This image will appear on your channel, on the video pages next to your name, and in the comments. Add channel art The channel art is the large banner that appears on your channel. You can use this space to add an image that’s consistent with your branding and customize it with info about your videos and your posting schedule. Add links to your blog and social media The button that helps you upload a new banner, also lets you customize links. You can add links to your website, shops, social media channels, or even to your newsletter...

GROW YOUR AUDIENCE. GROW YOUR INCOME.

Image
Photo by   Priscilla Du Preez   on   Unsplash You’ve worked your butt off to build a large, engaged following of fans. You’ve been replying to comments, getting to know your fans on a personal level, and have built up a great sense of tribe with them. Now that you have an amazing community, let’s start promoting the “-unity” and help your fans get to know each other! Why is it important, you ask? Interaction between your fans promotes an even more solid community around your art Your fans each have a common interest – your work! And because of that, they’re bound to have more in common, too. When you start the conversation, your fans will run with it, and create new friendships amongst themselves. This is a great way to not only promote friendship and camaraderie in general, but this also helps to reinforce the structure of your loyal, interwoven fanbase. Here are some ways to get your fans introduced to each other: Encourage conversation between ...

7 Undeniable Reasons to Hire a Freelancer

Image
Independent contractors (or freelancers) are a perfect fit for product managers and marketing directors in charge of developing promotional content and technical communications for their brand. Let’s straighten one thing out first – what do I mean when I say “freelancer” or “independent contractor”? The term has bad connotations for some marketing managers. I’m not talking about the guy in India who designs logos for $1 an hour, or the college student who takes part-time jobs for some extra income. The “freelancers” I am referring to in this article are the tried and true professionals, the full-time independent contractors and small business owners who consistently provide top-quality work – and who also choose to enjoy the many advantages of working on their own terms. Your Most Valuable Business Asset The value of these professional contractors to a marketing manager cannot be overstated. In fact, I would argue that a quality freelancer is a marketing m...

How to partner with influencers to create engaging marketing campaigns.

Image
Step by step process to find the right influencer for your brand. After studying some of the most successful e-commerce Instagram marketing campaigns I learned that most of them revolve around influencer marketing. Finding the right influencer for your niche is a great way to boost your reach and increase your content engagement. In this post, I’ll show you the benefits of using Instagram influencers to market your content. I will teach you how to identify the best influencers for your specific brand and develop a successful outreach strategy, so that you can use their credibility and reach to drive more traffic to your Instagram page and convert more customers.  Photo b Kyaw Tun What is an influencer? Instagram influencers are thought leaders, niche experts, or brand promoters who are trusted and well-known by your target audience. The power of Instagram influencers to bring attention to a brand is undeniable; ...

Hire a Professional Graphic Designer

Image
I don’t recall the number of times a small business owner or work colleague came to me with a logo designed in PowerPoint looking to expand their marketing materials for their business. As most small business owners do they try to cut corners when they first open their business and unfortunately skimping on your businesses look and feel can be a costly fix later on. Graphic design requires a creative expert. There is a major difference from a $25 logo you purchased from an online site and one that has been customized for you and your businesses. Good graphic designers will know the best approaches to communicate your products and services to your customers. They will know what your competition does (because they will research it), the will take your preferences into mind and then come up with a number of creative solutions to get your message across. Most importantly they will develop the logo/art in the proper software so that it can be printed by any printer. D...

Selective Color with Photoshop

Image
In this Photoshop tutorial, we'll learn an easy way to create a popular selective coloring effect, converting a photo to black and white while leaving the main subject in full color. If that sounds complicated or time consuming, it's not. In fact, as we'll see, the entire effect can be created in just a few short steps using nothing more than a selection tool, an adjustment layer and a layer mask! To create the effect, we'll be using a Black & White image adjustment. Here's the image I'll be using for this tutorial: Step 1: Select the main subject in the photo (Lasso Tool, Quick Selection Tool, Pen Tool, etc), in this tutorial, i selected the phone booth and bus, draw a selection outline around the main subject of your photo.  When you're done, you should see a selection outline (the marching ants) around your subject. Step 2: We now have selected the main subjects, and we want the background to be black and white. What we have to do now is ...

How to Cut Out Background in Photoshop

Image
Want to change the background of your photo? Do it yourself with Photoshop. One of the most useful skills you can learn in Photoshop is removing the background from an image. This will allow you to stick the subject in any picture that you want, without having to worry about blending backgrounds, or dealing with large expanses of plain white. Step 1 Open the image in Photoshop. Step 2 Navigate to the Layers window and duplicate the image, so that you will have a back up.  Select your image layer click ctrl+J for windows or option+J for Mac, and hide the original layer (click the eye icon) Step 3 Create a solid color below the duplicated image, click    icon and select solid color, choose any dark color you want, this will help you to see the residues. Step 4 Select background eraser tool, and set the settings (you can play on the values, this will depend on your image) Step 5 Start erasing your background,  play aroun...

The world’s gone mobile. Now, it’s your turn.

Image
Millions around the world use website to start their own business, sell online, showcase their achievements and communicate with visitors in a thoughtful and meaningful way. And according to Google, users spend 177 minutes on their mobile phones per day. Are you one of them? It's no secret that shoppers expect a fast mobile experience. If there's too much friction, they'll abandon the website and move on. Consumers want to quickly pay bills on finance sites, get rapid results when they're browsing vacation reviews, and view an article immediately when they click through. Despite the fact that more than half of overall web traffic comes from mobile, our data shows that mobile conversion rates are lower than desktop. In short, speed equals revenue. Website visitors now expect their mobile experience to be as flawless as desktop, and the majority of online businesses are failing to deliver. It's time to find out how well your site works across mobile and desk...

Girl in Red Double Exposure

Image
In this tutorial we’ll create a trendy double exposure effect in Adobe Photoshop with the help of Blending Modes and Clipping Masks in a few steps. You can download and use the images here  woman https://www.pexels.com/photo/woman-girl-hairs-portrait-69494/ sunset https://www.pexels.com/photo/sunset-147465/ city https://www.pexels.com/photo/city-lights-during-night-time-25926/ STEP 1 Open the woman image in photoshop, lets make it black and white. In this tutorial, i used the threshold method. Go to  Image > Adjustment > Threshold. Adjust the value to 111 (you can play on the value). STEP 2 Next, let's open the second image (city), drag and drop it on top of the woman layer. Adjust the size until it fit the body part, change the layer mode to "SCREEN" mode, right click mouse then choose create "CLIPPING MASK". Now you will see the city layer image is now overlaying on woman body. STEP 3 Next, open the third image (sunset), drag...

The Color Lookup Adjustment Layer

Image
The  Color Lookup Adjustment Layer  lets you pull up different  Color   Variations  such as Horror Blue, and Candlight. While this isn’t the best  Tool  for doing fine  Color -tuning, it’s great for creating multiple versions of the same image in seconds.  watch video here The Color Lookup Adjustment Layer If you liked this video article, then please subscribe to our YouTube Channel for our video tutorials. You can also find us on Twitter and Facebook. Website :  www.asterali.com  Subscribe to my  Youtube channel  FB:  https://www.facebook.com/asteralicreativestudio/  Twitter:  https://twitter.com/asterali

Let's Play with Colors in Photoshop

Image
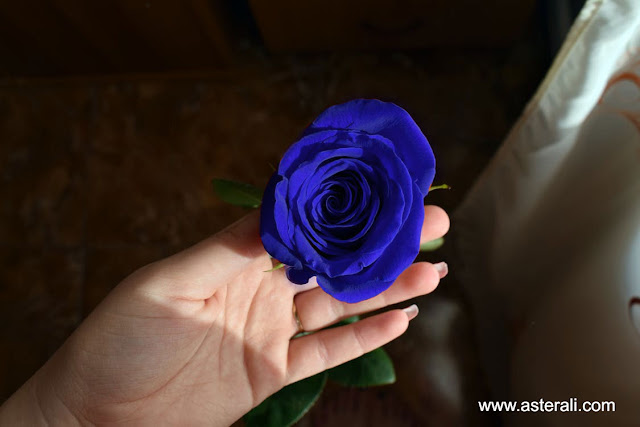
Playing colors with Photoshop is fun fun fun....i'll change the color of this flower from 1 color to multi color. Check out my fun video . to  Let's Play with Colors in Photoshop If you liked this video article, then please subscribe to our YouTube Channel for our video tutorials. You can also find us on Twitter and Facebook. Website :  www.asterali.com  Subscribe to my  Youtube channel  FB:  https://www.facebook.com/asteralicreativestudio/  Twitter:  https://twitter.com/asterali

Photoshop Tutorial Double Exposure

Image
Photoshop Tutorial Double Exposure Video Tutorial  Photoshop Tutorial Double Exposure Video Tutorial  If you liked this article, then please subscribe to our YouTube Channel for our video tutorials. You can also find us on Twitter and Facebook. Website : www.asterali.com  Subscribe to my Youtube channel  FB: https://www.facebook.com/asteralicreativestudio/  Twitter: https://twitter.com/asterali

How to Add a Lens Flare to an Image in Adobe Photoshop

Image
In today’s post, I’ll be demonstrating how to go about adding a lens flare filter to a photo. In the sample image, there’s already an abundance of sunshine, which will work perfectly with what I’d like to do with it. Watch video tutorial here If you liked this article, then please subscribe to our YouTube Channel for our video tutorials. You can also find us on Twitter and Facebook. Website :  www.asterali.com  Subscribe to my  Youtube channel  FB:  https://www.facebook.com/asteralicreativestudio/  Twitter:  https://twitter.com/asterali

How to Colorize in Photoshop

Image
"Click here to watch video tutorial" Learn how to use Colorize to change the color of any object in Photoshop! Create a Selection of the Area You Want to Colorize In order to colorize a specific area of a photo, first you will need to create a selection around that area. In this example, we use “Select-Color Range’ to select out the red rose. Hue/Saturation + Colorize Once the  rose is selected, click on the ‘Colorize’ Button in the Hue/Saturation Adjustment Layer Properties window. When Colorizing an image, you have control over Hue, Saturation, and Lightness. You can use the combination of these three sliders to make any color. In this tutorial, we use Hue/Saturation Adjustment Layers to Colorize rose petals. If you liked this article, then please subscribe to our YouTube Channel for our video tutorials. You can also find us on Twitter and Facebook. Website :  www.asterali.com  Subscribe to my  Youtube channel  FB:  https://www.facebo...

Transfer Wordpress Site to New Hosting Server

Image
That’s all, hopefully your live site will be up and running by now. Checkout your site to make sure that every thing is working fine as expected.   If you liked this article, then please subscribe to our YouTube Channel for our video tutorials. You can also find us on Twitter and Facebook. Website : www.asterali.com  Subscribe to my Youtube channel  FB: https://www.facebook.com/asteralicreativestudio/  Twitter: https://twitter.com/asterali

Display the Last Updated Date of Your Posts in WordPress

Image
Do you want to display the last updated date of your article in your Wordpress post or page? In this article, we will show you how to easily display the last updated date of your posts in WordPress. In this tutorial you will need to add code to your Wordpress files. We recommend you to install " My Custom Functions " plugin in your Wordpress site so you don't touch your core files. 1. Add this code block of code to   My Custom Functions function wpb_last_updated_date( $content ) {         $u_time = get_the_time('U');         $u_modified_time = get_the_modified_time('U');         if ($u_modified_time >= $u_time + 86400) {                 $updated_date = get_the_modified_time('F jS, Y');                 $updated_time = get_the_modified_time('h:i a');               ...